OK, this has to be the coolest development yet - a dressform made EXACTLY to measure by a 3-D printer!!! check out the company working on this at "DittoForms". The technology is available only in Washington (DC) at the moment, but efforts are being made at making it more widely accessible. Almost worth travelling to DC for...
Why is this so exciting? 3D technology will make a dressform exactly like the person - the slope of the shoulder, the slight differences between the slope of the shoulders, the size of the armhole, the natural asymmetry of the body, the curve of the back - the list goes on and on. Not even the very best and most expensive dressform fits any real person perfectly. Enter 3D... wow!
Only one of the many things I learned at Costume College today - for this, thanks to my fellow student Alex.
Wednesday, 23 September 2015
Sunday, 20 September 2015
When in danger, when in doubt...
"When in danger
when in doubt
run in circles,
scream and shout!"
This little rhyme came to me - and amused my fellow students - when I ran into a snag with my lace trim.
Unnoticed by me, the shop sold me the trim in two pieces stapled together. One piece was about 20", the other almost 10 yards. Oh well, I thought, looking at them: I can use the small piece for the sleeves...

It also seemed logical to use the small piece to work out the velvet scallops on the gown's trim band, over which the gold lace was then to go...
You can see where this is going - yup! after I had done all the careful measuring, pattern making, cutting, adhering, trimming, and went to apply the five yards of gold lace, to my dismay I discovered that actually the weave of the short piece, and of the longer one, was not identical:
Darn double darn!!! Fortunately the weave of the short piece was just a bit smaller (rather than larger), so it became a matter of working the extra onto the just-a-bit-too-small pattern already laid out. Not what I had intended, but as our guest tutor Rose had wisely said: costume making is problem solving.
Now the gold lace stands out a bit (in a 3-D way) - "design choice"!
when in doubt
run in circles,
scream and shout!"
This little rhyme came to me - and amused my fellow students - when I ran into a snag with my lace trim.
Unnoticed by me, the shop sold me the trim in two pieces stapled together. One piece was about 20", the other almost 10 yards. Oh well, I thought, looking at them: I can use the small piece for the sleeves...

It also seemed logical to use the small piece to work out the velvet scallops on the gown's trim band, over which the gold lace was then to go...
You can see where this is going - yup! after I had done all the careful measuring, pattern making, cutting, adhering, trimming, and went to apply the five yards of gold lace, to my dismay I discovered that actually the weave of the short piece, and of the longer one, was not identical:
 |
| Top: shorter piece; bottom: longer piece |
Darn double darn!!! Fortunately the weave of the short piece was just a bit smaller (rather than larger), so it became a matter of working the extra onto the just-a-bit-too-small pattern already laid out. Not what I had intended, but as our guest tutor Rose had wisely said: costume making is problem solving.
Now the gold lace stands out a bit (in a 3-D way) - "design choice"!
Sewing with Velvet
Ooh la la!
One of my goals with this course was to learn to sew with velvet - a tricky fabric if there ever was one. My limited previous experiences had not been exactly rewarding... Velvet has a definite 'nap', which means that little minute 'fluffies' stand up (my own technical term - probably more accurate, from Wikipedia https://en.wikipedia.org/wiki/Velvet: 'a type of woven tufted fabric in which the cut threads are evenly distributed, with a short dense pile').
For my bustle gown I chose to make the trim parts - sleeves, collar, peplum, gown trim band (i.e. the trickiest parts) - all out of velvet.
Most important lesson learned: buy the most expensive velvet possible, with a good amount of silk. Probably what you can afford isn't 100% silk, but a combination of silk and rayon. Even this blend, however, 'acts' differently than (cheaper) polyester substitutes - if you treat it respectfully, it cooperates beautifully, whereas polyester velvet fights you every step of the way no matter how much attention you give it. Memo to self: never buy polyester velvet again.
Other lessons learned:


Check the two pieces on the left hand side - they're the same, so I'm actually cutting four instead of the two I need. Why? well, with velvet there's a dilemma: grain versus nap. Normally you adhere to the grain line when cutting (grain line: straight grain runs parallel to the selvage edge), but for velvet that can throw off the nap. So, given that the pieces were small, I cut out two options: one runs with the grain, the other with the nap. When I sew them together on Monday, it will become clear which is the better option.
Cutting into velvet causes lots of the little fluffies to come loose. I thought the resulting 'shadow pattern' on the muslin was kind of cool:

Finally - basting and hand sewing are part of the price to pay for velvet. Since I was going to be doing almost five yards, I made myself comfortable!

One of my goals with this course was to learn to sew with velvet - a tricky fabric if there ever was one. My limited previous experiences had not been exactly rewarding... Velvet has a definite 'nap', which means that little minute 'fluffies' stand up (my own technical term - probably more accurate, from Wikipedia https://en.wikipedia.org/wiki/Velvet: 'a type of woven tufted fabric in which the cut threads are evenly distributed, with a short dense pile').
For my bustle gown I chose to make the trim parts - sleeves, collar, peplum, gown trim band (i.e. the trickiest parts) - all out of velvet.
Most important lesson learned: buy the most expensive velvet possible, with a good amount of silk. Probably what you can afford isn't 100% silk, but a combination of silk and rayon. Even this blend, however, 'acts' differently than (cheaper) polyester substitutes - if you treat it respectfully, it cooperates beautifully, whereas polyester velvet fights you every step of the way no matter how much attention you give it. Memo to self: never buy polyester velvet again.
Other lessons learned:
- always sew WITH the nap, never against it. Even during hand sewing, stitching against the nap causes little nap fluffies to adhere to the thread and make it tangle. Sew with the nap, however, and 'bob's your uncle'.
- pressing velvet is an art, because if you do press it even a little bit too much, the nap lies down flat, never to stand straight again (sort of like wheat that falls over in the field). Techniques: use a needle board (but take care: the needles can leave an imprint); sacrifice a piece of the velvet as press board, using it under the piece you are pressing; above all, press VERY lightly, minimally. Interestingly enough, silk/rayon velvet needs little pressing.
- baste seams, and pin on either side, to minimize 'seam traveling' (the nap causing the seam to slide about).
- loosen tension on your sewing machine to accommodate the looser weave of the velvet
- back cut pieces with organza to ensure they keep their shape (because silk velvet is almost like water, it slips and slides and slithers). That means cutting out the organza first, then the velvet.
- cutting it out: a whole operation (see pictures below).
To cut out velvet:
First of all, decide on which way you want the nap to run, up or down - because the colours can be quite different!
 |
| Left: nap running up; right: nap down |
Normally the nap runs down on a garment because of the way things wear, but in my case I chose to run the nap up because I loved the darker chocolate shade. Whatever you choose, though: the key is to cut out all pattern pieces with the nap running the same way! This takes extra yardage, of course.
Next, ensure straight grain for this slippery fabric throughout the cutting process. First pin a base of muslin squared to your cutting table. Then, pin the velvet squared to the muslin:

Next, pin the pieces to the velvet, only in the seam allowances of course (because pins mar the nap):

Check the two pieces on the left hand side - they're the same, so I'm actually cutting four instead of the two I need. Why? well, with velvet there's a dilemma: grain versus nap. Normally you adhere to the grain line when cutting (grain line: straight grain runs parallel to the selvage edge), but for velvet that can throw off the nap. So, given that the pieces were small, I cut out two options: one runs with the grain, the other with the nap. When I sew them together on Monday, it will become clear which is the better option.
Cutting into velvet causes lots of the little fluffies to come loose. I thought the resulting 'shadow pattern' on the muslin was kind of cool:

Finally - basting and hand sewing are part of the price to pay for velvet. Since I was going to be doing almost five yards, I made myself comfortable!

Saturday, 12 September 2015
Fabric Shopping - London's Gold Hawk Road
Bustle gowns need fabric - LOTS of fabric, to the tune of 10-15 meters - so off we went to London to the stores on Gold Hawk Road. If you know Toronto's Queen Street, or Hamilton's Ottawa Street fabric area, you've already got an idea of it. The same except much bigger - and of course in London! I liked London, by the way - the city has an energy that reminded me of Amsterdam, or Berlin.
We did also go to The Museum of London where the curator gave us a first-hand look at a number of fascinating historical bustle gowns from about 1850-1890. He had included several interesting bustle cages, including one with nifty ties to control the span at the back. The gowns presented construction puzzles, as the historic original was obviously there but sometimes altered by subsequent wearers of a different size and for another purpose. No pictures - we were under strict order not to publish any of the photos we were allowed to take for our own purposes. Sorry!
After a night at a hostel (I know... I'm getting a little old for hostels, but at London accommodation prices...) we took the tube to Gold Hawk Road. What fun! loads of little shops, all crammed into one manageable block. A few images:


The goods: everything except quilting cottons!
For notions - here called, elegantly, 'haberdashery' - it's best to go to a stall in the adjoining Shepherd's Bush Market:
Sadly - precisely what drew us to this area is slated for demolition. The cubby-hole stores and restaurants will be bulldozed, the buildings behind renovated for (high-end) condos (well - are there any condos in London that aren't high end, by definition?).
We all got fabric to our liking, mostly within budget. It's an art to get it all done in six hours - so many possibilities, so many choices! It takes imagination to look beyond the fabric on the roll to the fabric made up into a gown. Below is mine: first on the roll(s), then in the bag. The gold lace is the icing that's going to make the cake (I hope):


We did also go to The Museum of London where the curator gave us a first-hand look at a number of fascinating historical bustle gowns from about 1850-1890. He had included several interesting bustle cages, including one with nifty ties to control the span at the back. The gowns presented construction puzzles, as the historic original was obviously there but sometimes altered by subsequent wearers of a different size and for another purpose. No pictures - we were under strict order not to publish any of the photos we were allowed to take for our own purposes. Sorry!
After a night at a hostel (I know... I'm getting a little old for hostels, but at London accommodation prices...) we took the tube to Gold Hawk Road. What fun! loads of little shops, all crammed into one manageable block. A few images:


 |
| Sofia and Jess debating strategy... |
The goods: everything except quilting cottons!
 |
| Velvets... |
 |
| Dupioni silks... |
 |
| Polyesters gridded with tucks... |
 |
| "Shot" (i.e. two-tone) polys |
For notions - here called, elegantly, 'haberdashery' - it's best to go to a stall in the adjoining Shepherd's Bush Market:
 |
| Our teacher Pauline and the stall keeper discussing colour |
 |
| Shepherd's Bush Market |
Sadly - precisely what drew us to this area is slated for demolition. The cubby-hole stores and restaurants will be bulldozed, the buildings behind renovated for (high-end) condos (well - are there any condos in London that aren't high end, by definition?).
We all got fabric to our liking, mostly within budget. It's an art to get it all done in six hours - so many possibilities, so many choices! It takes imagination to look beyond the fabric on the roll to the fabric made up into a gown. Below is mine: first on the roll(s), then in the bag. The gold lace is the icing that's going to make the cake (I hope):


Thursday, 3 September 2015
Draping on the Stand (II)
Draping the bodice - or upper body - to obtain a pattern is also an interesting process. The essence of draping: moulding a flat piece of fabric to a curved body.
Take a substantial piece of muslin and start by pinning a straight-grain fold exactly on the centre front, with necessary excess at the top. Then smooth it to the neck and shoulder seam and pin there - for a fitted garment, make sure it's as smooth as it could possibly be. Let it hang "where it will" from the shoulder down - that, too, is (should be) a straight grain. Pin that straight grain to the side seam. Take away the inevitable excess in front by shaping darts, in part as the fabric wants to fold and in part how you want the fabric to fold. This is the result:

On the back I used the same process to produce a side panel rather than darts (so the back will be in three pieces: centre back and two side panels):

While the resulting muslin can be used directly as a pattern, a number of us chose to transfer the pattern from the muslin to paper by tracing lines using a tracing wheel, then drawing on the paper. Paper has the advantage of not being in any danger of stretching and can be more easily and accurately cut:

New to me, but a good idea: use black tape to simulate details, both to evaluate their desirability and for placement. If you look closely, you can see how long the muslin bodice is, providing lots of scope for length options:


Then use the pattern to make up the bodice you've decided on, using colour "just to see" what a plan looks like in execution (oh, the sleeve - drafted it using the block pattern method):

And the the acid test: will it fit ME rather than the mannequin? Turns out it was all pretty accurate, although there are inevitably a few alterations since a mannequin only ever approximates a person.


Draping on the Stand (I)
Yet another way of creating a pattern is by draping fabric directly on the stand. It's something I've been intrigued by for years, and one reason I decided to take this course. Well - it's an interesting process.
We spent (are spending) this week on creating the toiles for our bustle gowns. A first step was creating the foundation skirt, for which we adapted the petticoat pattern. As they say in Dutch: by now that's a "makkie"! (simple). So no more about that.
For period gowns from the late 1870s or later 1880s, generally that foundation skirt at most peeks out from under voluminous draping, the (back) bustle, lace, ruffles, and potentially a train - these "drapings" are literally that, draped. A few pictures of my fellow students hard at work:
 |
| Jess (fore) and Emily (back) - Jess is working on the front "apron" |
 |
| Sofia - bustle on, now adding ruffles |
 |
| Alice working on the bustle |
 |
| Kas with yards and yards and yards... |
Me - I decided to forego bustle, drapings, ruffles, I just couldn't see myself in them. Instead, I became inspired by Emile Pingat (see some of his fabulous designs at An almost-forgotten Parisian designer) and Pauline allowed me to adapt an 1892 gown to the 1880s bustle craze. My concept: "Her Ladyship," simple but imperiously sweeping lines, a dramatic waist and trimmed train.


First step: try things out, and make things easier for yourself by elevating the mannequin!
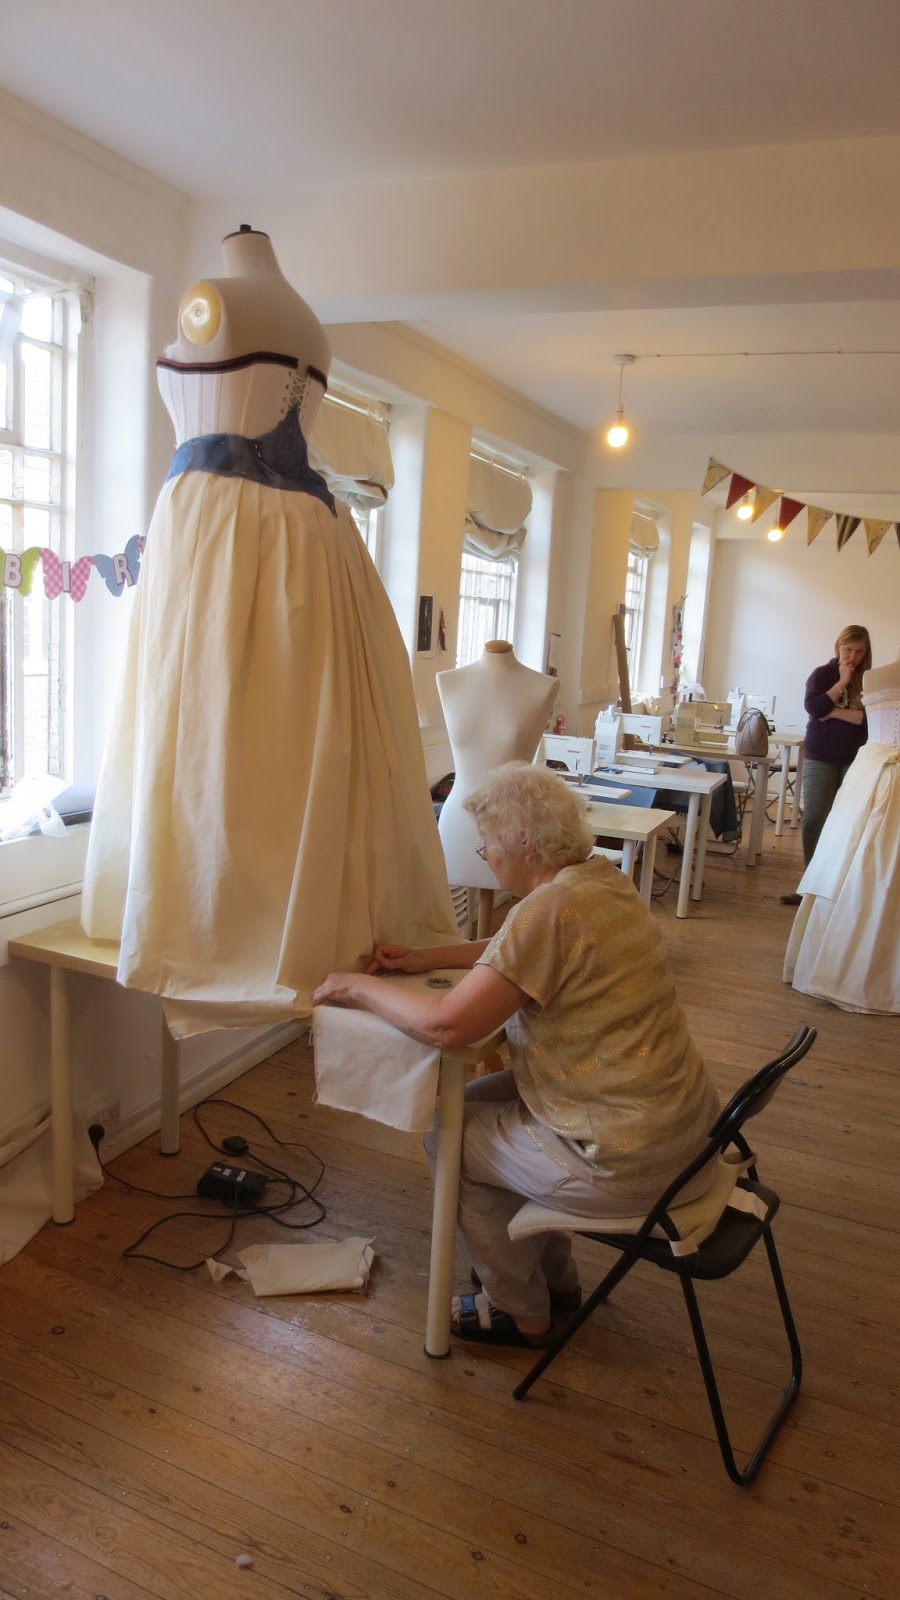
Second step: stand back and evaluate. Verdict: concept good. However, with the trim, the train needed tweaking - take out the centre back pleat and add a (dramatic) godet to get the right profile. Rip seams, measure and cut godet, install. Done. Also, the trim was too wide and it should be edged closer to the hem. Noted in my "Draping Notes."

Just FYI, those are not the colours of the gown, blue just happened to be lying about in approximately the right shape. Will post about draping the bodice - when things get really challenging - in the next posting.
Subscribe to:
Posts (Atom)