Friday, 13 May 2016

"Rough Braid"

During my first week in York I learned a new technique: "rough braid." "Braid" as such is familiar, of course - you buy it, often at greater expense than you'd like, from a store.

When you have a hundred costumes needing braid, however, as well as a limited budget, AND those hundred costumes are for mostly poor-ish people in a crowd scene, you turn to "rough braid." It's shorthand for braid you make yourself, from fabric scraps. The goal is to provide visual stage interest without going to great expense.

First: select a garment you want to trim - or, in our case, take one of the garments with a "tasks sheet" which says, for example, "rough braid around hem and neckline."


Give the outfit a quick visual to see what kinds of colours might work for it as a whole, then take the item to be "rough braided" to the scrap fabric bin to select material:


Cut fabric into strips, then look at the samples to get an idea of what kind of "braid" might work for the type of fabric (heavy, light, ravelly, rough, smooth) you've selected:


Here's the rough braid I made, on the garment in the first picture:


I realize that I've probably been making a version of "rough braid" for quite a while - almost anything that is not specifically made and purchased as "braid" could be called "rough braid." What I learned in this process, though, is that anything goes, and rough edges are actually desirable since they add texture and visual interest generally. Hmmm.... all that ravelly dupioni silk I have at home... could rip it into strips and braid it... hmmm...

Monday, 9 May 2016

York Mystery Plays Costume Adventure

I've just finished the first of my five weeks in York, where I am one of a team of volunteers making costumes for the 2016 version of the York Mystery Plays. They're (late-)medieval, originally staged by York's various guilds, now resurrected as a major tourist attraction every four years. This blog post focusses on the plays and the places, subsequent posts will introduce people and the actual costuming work.

The Mystery Plays (see: https://en.wikipedia.org/wiki/York_Mystery_Plays) are a cycle of 48 episodes telling the Christian story from Creation through the Last Judgement. "God" is a character, as are devils and angels, and of course human beings and that most famous god/man, Jesus. As you can imagine, it's a huge cast. Typically Jesus is played by a professional actor, while all the others are volunteer amateurs from York itself. Many of the supporting roles - such as we costume makers - are volunteer as well.

In the past the plays have been staged in various venues around the city, including outdoors. This year, though, they will be performed in The Minster, a most impressive facility for such a production:


The building where we're working on costumes is right next door, a fifteenth-century structure originally built as a college for clerics who needed some remediation (according to gossip):


My way in goes through that central door with its heavy cast iron latch, through a corridor and another door, then up this grand creaking staircase:


Which staircase looks all the better for having yards of fabric draped over the railing...


One of the grand halls on the second floor is filled with racks and racks of costumes:


There are a few sets of angel wings lying around (chicken feathers, is my guess) - maybe for Gabriel?:


And this is our sewing room - two sergers, six Janomes, a "haberdashery" (gotta love that word) cupboard. The ironing station is around the corner, a large cutting table in another room. That's Fran in the middle, she directs what we do on a daily basis.


Saturday, 19 March 2016

Making Madeleine Vionnet

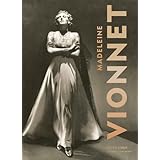
Friday I got in the mail my very own copy of Betty Kirke's fabulous book on Madeleine Vionnet. Delight - better than ice cream! (or whatever your treat of choice...).

Product Details

However...

The 30 patterns in the book are mystifying, to say the least. Yes, there are lines labelled "D" and "F", and instructions to "join D to F", but there is no scale, there are no measurements. The best a person can do is measure the actual little drawings and scale up - which, as I know from other pattern scaling during the course, can lead to disastrous magnifications.

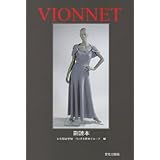
So I turned to Dr Google, and indeed, there are great discussions of how to recreate Vionnet there. One of them is a most informative blog post comparing Kirke's Vionnet, and the Japanese book based on it, in Fashion-Incubator hosted and edited by Kathleen Fasanella. Even if you don't read Japanese, this is apparently THE book to get if you want to actually make a Vionnet, since the patterns have been tested and retested by a research team, and recreated. Bonanza!!


Product Details


For a sample discussion on recreating one of the patterns, see Recreating Pattern 14. This sewist, too, used both Bunka (the Japanese book) and Kirke's. I guess I'll be ordering one more book!

Monday, 19 October 2015

Final Exhibition Oct 16-17

After the photo-shoot, it seems almost like a let-down to write a post about the exhibition. However, it WAS a major event in the life of us as costume students, so for the record...

It was also lots of fun. Many people came - family and friends, people in the theatre industry, passing tourists off the street. There was much oohing and aahing, many compliments, a great deal of interest and amazement.

First of all, we transformed the sewing studio from this:

into this:
Alex: funky as always
Emily: lots of bows and other detail
Jess: quiet elegance
Alice: splashes of colour
Kaz: lots of sparkle and pizzaz
Sofia: understated excellence
Minnie: lots of information on process

It was interesting to see how each display confirmed the person whom we had gotten to know during the 15 weeks.

Once the displays were up, and we were all dressed in our 30s gowns (both to add the the festive air, and because there aren't enough mannequins for everyone to have four), Pauline broke out the champagne for a toast to our success. I was delighted that Wendy and David Brooks, my landlady and landlord for fifteen weeks, were able to come:


My display was heavy on information, particularly about process - "working with velvet", "why pouf pants are poufy", "how much steel goes into a corset", that kind of thing. A number of visitors remarked positively on that aspect, and many asked questions.

In addition, taped across my window was the huge map of Canada Pauline had bought because two of us were from Canada this year:


I figured people would notice my accent and ask - which indeed they did. Interest in Canada was high among the visitors; those who had been, or had connections, enjoyed locating on that big map places they knew of. All marvelled at the size of the country. A few lingered, imagining with some longing that kind of space, asking about the geography. As I remain a Canadian geography enthusiast, it's likely that I generated a number of future tourist visits!

At the end of the exhibition, Saturday at 4:30, we packed up and restored the studio to readiness for the next course, which starts in January. Many hands made light work, it took about an hour. And I'm pleased to report that all my costumes fit into my duffle bag, no problem.

Sunday, 18 October 2015

The Results - Photos!!


Since I put in my final photo-shoot stitch at 5:24 p.m. a week ago Saturday, it's been a whirlwind: the shoot, the duffle bag, preparing for and hosting the two-day exhibition (separate post), packing everything up, taking leave of the people I've spent so much time with. Now I have almost two days before I take the overnight bus to Heathrow for the trip home. It's been an amazing four months.

The photographer shot front and back views of individual costumes, as well as each period in a group. I will do separate posts for each period with everyone's costumes (still have to ask their permission, though, didn't think to do that) so those who are interested can check out the fine and imaginative work by the whole class in greater detail. I feel very privileged to have worked with these talented young women!

In the order of the making, then: Tudor modelled by James, 1880s bustle modelled by moi, 1930s Madeleine Vionnet bias cut (again modelled by moi).  Venues for the shoot: York's 15th-century Guildhall for the older costumes (York Guildhall), for the Vionnet gowns the art deco Belmont Room in the renowned Betty's Tea Room (the Belmont Room is a1937 copy of the stateroom in the Queen Mary, which made her maiden voyage in 1936: Betty's in York). Doesn't everyone look FINE!!!

First the Tudor:


Next the late 1880s bustle gown:


Finally the 1930s Vionnet:


The photographer also took a picture of me photographing James and showing him the results. They're nice shots - and they show how tired I was... but goodness, it was all worth it!


Tuesday, 13 October 2015

Duffle Bag

The logistical problem of getting my costumes home has been occupying (read: worrying) me for some time. It's a question of both weight and volume as well as expeditious navigation of Canadian customs.  For awhile it wasn't clear how to tackle that combination.

Researching the shipping options and getting a better handle on what had to be transported led me to decide that the best option would be the biggest allowable duffle bag, paid for as extra bag on the flight home. A duffle bag is sufficiently lightweight that it doesn't take up weight on its own, and sufficiently expandable that bulky items can more easily be fit in.

Next problem: getting such a duffle bag. Of the ones available to me here, some were too small, some were too big, some were too heavy - and all were too expensive. So on a whim I decided to try to make one, exactly to airline checked baggage specs (so: no more than 62" as the sum of length, width, height) and cheaper and lighter than anything I could purchase. The result:


It's actually just a little over 60" (30+15+15: best to err on the side of caution), and cost exactly 6 pounds 65 pence or approximately $14 dollars. Materials: small tarp, 2 meters rip-stop nylon, 1 zipper, two back-pack clips, one bit of velcro. I'm pretty pleased with it!

Oh, and on weight - my landlady lent me a nifty mechanical luggage scale, an old-fashioned "hook with pulley and scale" type of thing. So for several days I went around weighing things. My Tudor trunk hose and doublet weigh just over 4.5 lbs - while Kaz's trunk hose alone weigh over 6 lbs! We knew it was heavier, but goodness, that's a LOT heavier. The next heaviest costume item for me is my bustle gown skirt, also 4.5 lbs. So costumes are no longer an issue. There ARE of course the 10 meters of Irish linen I bought myself as a birthday present...

Still, it looks like I will be able to get my stuff home. I'll breathe a sigh of relief once it actually is, though.

Saturday, 10 October 2015

Sprint to the Finish

Monday, 8:15 a.m., we are to report for photo-shoot activities.

A fair bit of chaos and many long hours of work are preceding this much anticipated event:


I myself put in my final pre-photo-shoot stitch at 5:24 today, hurray!!! and that after 70+ hours last week, six solid and long days this week. Probably not my final stitch ever, as it is inevitable that wearing the outfits during the shoot will reveal snags and insufficiences requiring repair before the exhibit next Friday/Saturday.

Just for fun, here's a picture of the little bustle-gown model I made weeks ago, out of a pop bottle, so I could try draping: