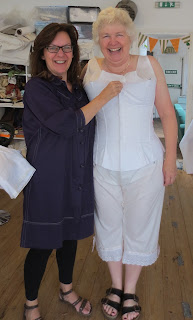
And I thought Tudor male fashion was an architectural marvel!
Last week we spent three days making an actual Victorian corset - this in a valiant attempt to get 21st-century figures into a 19th-century hour-glass shape. As a society we have simply gotten larger, all of us - even the thinnest women of today no longer have the shapes which the corset imposed on our counterparts in the 1870s and 1880s.
We started with a "photocopy-enlarged-to-basic-size" pattern, which we then altered to fit our various bodies (in corsets, accuracy is important - hence the carbon paper pad for marking seams):
Next we made it up from two layers treated as one, a skin-side layer of soft lightweight cotton, an outside layer of a fabric called coutil: "Although coutil is more expensive, it is better for corsetry because of its weave. Coutil has a special herringbone weave that makes it very strong. It doesn’t shrink or stretch nearly as much as denim or canvas, so it provides a sturdy, non-stretch base for long-use corsets" (this from Dramatic Threads - post on corsets).
For the course, coutil comes on a big roll - ah, the luxury of rolls of fabric!:
Corsets are laced in the back, of course. The line of grommets for the lacing goes between two metal plates, so the markings and the grommet placement have to be pretty exact.
Punching the holes is always a little unnerving...
But putting in the grommets with our industrial grommeter is always fun (note to self - don't put thumb under the pin...):
Inside the corset, steel as a modern substitute for whalebone. From left to right: front hook plates, straight plates for the back, front eye plates (with the gold), coil rods. Many of these had to be sized to fit, which means cutting with metal snips, filing with metal files, manipulating ends with pliers.
Getting ready to sew the channels for the metal (my corset: 20 pieces):
Once we had sewn up the - 10 - panels, Pauline helped us try it on for fit (over our Victorian 'onesies'), with just the plate rods at the centre back. I did have to make mine smaller!
Final steps include putting in extra channels for more rods, adding top trim (I opted for some racy red-and-black striped silk with a bit of black chiffon and lace...), adding a bottom bias binding, stitching as close to all that metal as possible to hold it in place. The poor machine has to go through some 10 or so layers at certain points, all with the zipper foot so that the needle can edge to the steel. Tricky sewing! And then the reward: the final fit:
About that final fit: corsets don't subtract, they redistribute. What you have has to go somewhere, so it goes - obviously - from the waist either upwards or downwards. Are they at all comfortable? well - they're not as uncomfortable as I had thought they'd be. No belly breathing, mind you. And picking things up from the floor - well, best to have servants, I guess.


No comments:
Post a Comment